


Why Winter Haven Homeowners Love Installing Luxury Vinyl Themselves
Luxury vinyl has quickly become one of the easiest flooring options for homeowners in Winter Haven who want durable, stylish floors without needing a full professional crew. Its click-lock systems, manageable plank sizes, and forgiving installation process make it appealing for motivated DIYers who want to refresh a room or tackle a weekend home-improvement project.
Many people exploring flooring options through Williford Flooring Company Inc. discover that luxury vinyl offers the perfect balance between beauty, performance, and DIY-friendliness. While professional installation always delivers the most polished and long-lasting results, plenty of Florida homeowners enjoy taking on smaller flooring updates themselves—especially in bedrooms, offices, or simple living spaces.
Winter Haven’s warm climate makes it important to prepare the flooring properly, understand how humidity affects installation, and choose materials that will stay stable over time. A thoughtful DIY approach paired with the right planning helps ensure the floor looks smooth, secure, and cohesive once finished.
What Makes Luxury Vinyl DIY-Friendly?
Luxury vinyl is one of the most accessible flooring materials for a few key reasons:
Easy-to-Handle Planks
The pieces are lightweight and easy to maneuver, especially in small and medium-sized rooms.
Click-Lock Designs
Most planks snap together cleanly, allowing DIYers to install new flooring without complex tools.
Versatile for Different Subfloors
Luxury vinyl works well over concrete, plywood, and some existing flooring materials, which simplifies planning.
Minimal Mess
There’s no need for adhesives in many modern systems, which keeps installation cleaner and more manageable for first-timers.
These qualities make luxury vinyl a popular choice for Winter Haven homeowners who want an approachable project that still delivers a beautiful finish.
Preparing Your Space: The Key to a Successful DIY Install
Understand How Florida Humidity Plays a Role
Winter Haven’s humidity can affect how flooring behaves during installation. Luxury vinyl needs a stable indoor environment to settle correctly.
Keep the room climate-controlled
Avoid installing during big weather swings
Let the material adjust to the space before starting
Let Your Flooring Acclimate
Planks should rest in your home for a period before installation. This helps them adjust to everyday temperature and indoor humidity conditions. It’s a small step that greatly improves long-term stability.
Clear and Clean the Area
Before installing, the room should be empty, swept, and free of dust or grit. Dirt left under planks can lead to unevenness and long-term wear.
Evaluate the Subfloor
Even though luxury vinyl is forgiving, it still performs best on a smooth foundation.
Check for:
Raised edges
Dips
Rough patches
Leftover adhesive from old flooring
A clean, level base helps the flooring lock together correctly and maintain its structure.
Plan Your Layout
Laying planks without a plan can lead to mismatched seams or uneven board distribution. A simple dry-run layout helps you see how the pieces will fall across the room.
Planning ahead makes installation easier and produces a more polished final look.
Tools and Materials That Support a Smooth DIY Project
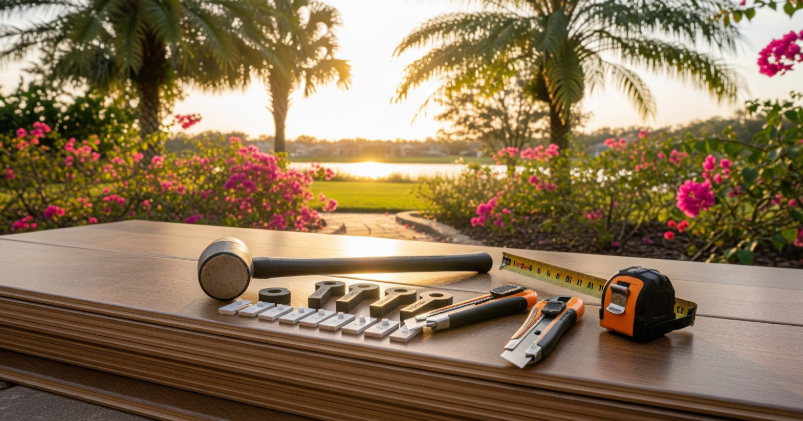
One of the reasons luxury vinyl is popular among DIY homeowners is that it requires only basic tools. Most tasks involve simple hand tools and layout supports rather than power tools.
You may find these items helpful:
A measuring tape
A pencil for marking planks
A straight edge or ruler
A soft-faced tapping block
A pull bar for tight spaces
Knee pads for comfort
A utility knife for trimming planks
These simple supports help you handle planks efficiently, line them up properly, and achieve clean cuts where adjustments are needed.
Installing Luxury Vinyl: Simple Steps That Make a Big Difference
Start With the Straightest Wall
Beginning along the most visually prominent wall helps keep seams aligned and the room looking balanced.
Use Spacers Along the Perimeter
Small gaps around the edges allow planks to move naturally throughout the year. These gaps stay hidden under trim once the installation is complete.
Stagger the Planks
Avoid lining up seams across the room. A staggered pattern looks natural and creates better structural stability.
Work Slowly and Check as You Go
Luxury vinyl is forgiving—taking your time helps avoid mistakes:
Tap planks gently into place
Check each seam for a tight fit
Keep the rows straight as you move forward
Leave Room for Expansion at Doorways
Transitions are important for making the floor look smooth between rooms. Planning them early helps the layout stay consistent.
By going step-by-step, you avoid common issues and achieve a professional-looking result even as a DIYer.
Tips for Cutting and Adjusting Planks
Crisp edges make a big difference in how polished your floor looks. Here are helpful approaches:
Score and Snap
For most cuts, score the surface and gently bend the plank to snap it. This works well for straight lines.
Use Templates for Irregular Spaces
Corners, cabinets, and door frames benefit from creating a small template first. This helps prevent mis-cuts and makes the final result more accurate.
Work With Patience
Accurate cuts help seams line up, prevent gaps, and make the room feel cohesive. Taking your time ensures the best finish.
Florida-Friendly Considerations for DIY Luxury Vinyl
Mind the Sunlight
Bright Winter Haven rooms with strong sunlight may cause colour fading over time. Choosing planks with UV-resistant wear layers helps protect your investment.
Avoid Installing Over Sticky Surfaces
If an adhesive from old flooring remains, it should be removed or covered with a suitable underlayment so the planks lay flat.
Check for Moisture in Concrete Subfloors
Rooms built on concrete slabs may see higher moisture levels. Ensuring the slab is dry helps protect the flooring from long-term damage.
Give Yourself Time
DIY flooring doesn’t need to be rushed. Working at a steady pace produces the most consistent appearance.
When a DIY Install Might Not Be the Best Option
Although luxury vinyl is DIY-friendly, certain situations may benefit from professional installation:
Larger rooms with long sight lines
Spaces with uneven subfloors
Multiple transitions between rooms
Complex layouts
Moisture-prone areas where preparation is critical
Many Winter Haven homeowners choose professional installation for bigger projects because they want the cleanest, most seamless appearance.
Enhancing Your New Floor With the Right Finishing Touches
Install New Baseboards or Quarter Round
Fresh trim ties the flooring into the walls and gives the project a polished, cohesive finish.
Clean the Floor After Installation
A gentle cleaning removes dust from cutting and helps the floor feel fresh and ready.
Add Protective Pads to Furniture
Soft pads help keep your new luxury vinyl flooring in great shape over the years.
These small finishing touches make the floor look complete and help maintain its beauty.
Enjoy the Results of Your Luxury Vinyl DIY Project
Luxury vinyl gives Winter Haven homeowners the chance to refresh their space with flooring that’s stylish, practical, and approachable for DIY installation. When you take your time, prepare the room, and follow a thoughtful layout, you create a floor that feels seamless, comfortable, and long-lasting.
If you’d like to explore more options while planning your project, Winter Haven homeowners often browse luxury vinyl flooring collections to compare styles, textures, and construction types.
And if you ever need expert guidance or prefer professional installation for a larger project, you can always get in touch. A flooring specialist can help you choose the right materials and support you in creating a home you love.


